Someone asked me recently if I had tried cutting stamp material with my ScanNCut and I haven’t. I do own some Pazzles green and blue stamp material but to be honest Ive only cut the green sheet once and it was to use as a rhinestone template, so not for rubber stamping at all.
I looked at the cutting guide which Gentleman crafter and Mel Heaton have put together and it had a recommendation for leather with deep cut blade set at 5 and pressure at 5 so I thought I would use that as my starting point.
Pazzles stamp media is available in both green and blue and from memory you use both the green is thiner and the blue slightly thicker.
I cut the green with the deep cut blade 5, pressure 5, speed 5 and only one cut.
I cut the blue with deep cut blade 7, pressure 5, speed 5 and again only one cut.
I wanted to cut a foam cushion layer that was about 3mm wider but the seem allowance option was greyed out.
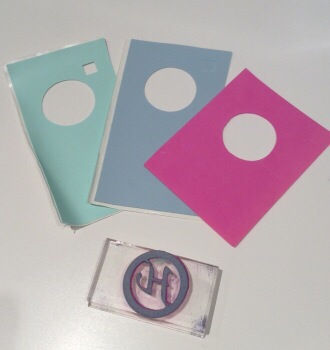
So I layered the green on top of the blue and then scanned it through the machine so that I could cut a 3mm outset layer for the cushioning. The foam I cut with the regular blade 12, pressure 7 , speed 5 and one cut.
I realised after that if I had unified the shape on the ScanNCut I would have been able to add the outset seem allowance without having to scan the shape back through the machine. The reason it was in separate parts is because the outside of the circle doesn’t touch anything. Well thats what I think anyway.
To cut the Stamp media with a Pazzles Inspiration the suggested settings were blade 3 , pressure 35 and 3 cuts. So the ScanNCut was far easier.
I designed this little monogram stamp in Canvas the complete size is 1.63 x 1.63.
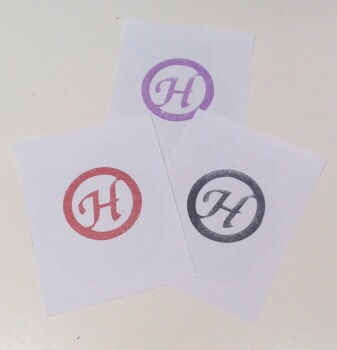
I used the Calgary Medium Italic font for the letter which I made in reverse and I think it’s turned out great and my daughter loves it as it’s for her.
Here’s a picture of the stamp material and foam as I cut it.
Here’s our first stampings and we think it’s turned out great.
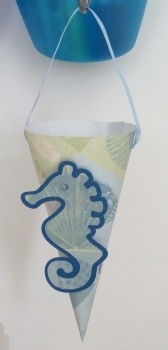
I used the quarter circle design in the basic shapes in canvas and welded a thin rectangle onto the side to create a tab fastening. I adjusted the bottom node to form a diagonal line on the rectangle to make it easier to glue in place.
I’ve used a shell design pattern paper, so cut a little sea horse from within the ScanNCut designs to add to the front to match. I also cut the shape a second time from card with a 3mm seem allowance to form a mat.
Makes a nice little part bag or would be nice filled with mini eggs or even cut smaller would be nice hung on a tree at. Christmas.
Here’s the cutting file Dropbox scanncut party cone cutting file
So last night I found a link to the Scrapbook Soup website scrapbook Soup and Julie Fei-Fan Balzer was showing some pop out cards she cut using the ScanNCut. She had printed out her designs and scanned them through the machine to make a cutting file. I thought I would show you in next weeks video how to make simple pop outs using Canvas so no need to print and scan.
Here is a little peek at some Ive made. So what do you think is anyone interested in this type of card? I will post the video tutorial on Sunday 20th April.
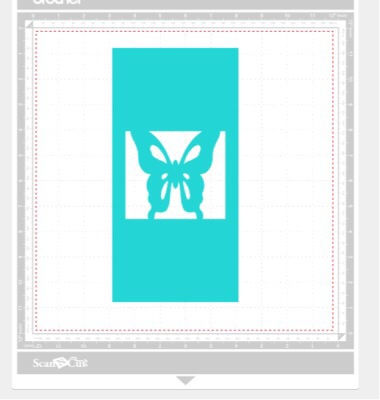
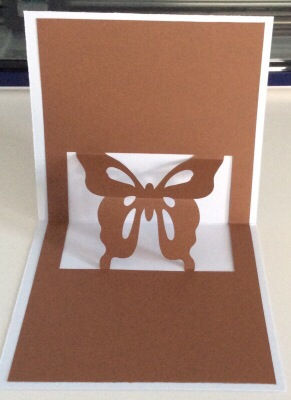
In the video which I’ve now recorded but haven’t processed yet I show you how to make the pop out in landscape but this afternoon I’ve had a little time and created one using the butterfly that is a pre installed project shape on Canvas and made it into a portrait orientation.
So for my blog subscribers you should get notification hopefully of this post update and I am including a link to the download file for anyone who wants it.
Here’s how it looked in canvas and how it looked once I had cut it.
Here’s the link to the cutting file.
Here is the video
